
Hawk GUI: RT Monitoring Channel Groups
It is possible to restrict a HawkEye to view a subset of the channels defined in the configuration.
The first step is to define the channel groups, in the “Chan Groups” tab of the Channel configuration screen:
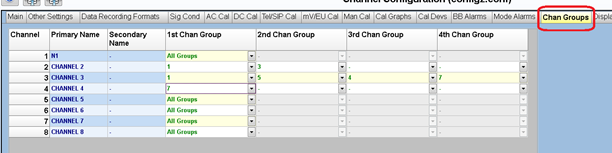
There are 16 different channel groups; each group is identified by a number (1 to 16). Each channel may belong to up to 4 different channels groups, or belong to all groups. In the screen shot above:
- “N1” belongs to all groups
- “CHANNEL 2” belong to groups 1 and 3
- “CHANNEL 3” belong to groups 1,5,4, and 7
- “CHANNEL 4” belongs to group 7.
- Etc.
Looking at it from a group point of view:
- Group 1 has all the channels except for “CHANNEL 4”.
- Group 7 has all the channels except for “CHANNEL 2”.
- Etc.
The second step is to assign a HawkEye client to a group:
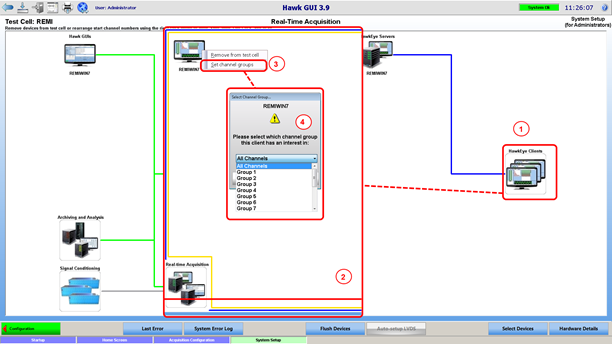
- In the Hawk GUI system setup screen, double click on the “HawkEye clients” group.
- System setup now shows the HawkEye clients in the test cell.
- Right click on the HawkEye client of choice, and select “Set Channel groups” option
- Select the group to assign the HawkEye to. Note that there is an additional option “All channels”. If chosen, the client will not be assigned to any particular group, and will display all the channels available.
The HawkEye displays its current channel group in the status bar.