
Database Administration
The Database Administration application is used to alter the database and should only be used by an experienced person as some changes to the database such as deleting data can not be reversed. Database Administration can be used for the following tasks;
- Delete data
- Check data integrity
- Authorise data
- Remove required flag
- Remove empty tapes or tape series
- Fix record times
- Find files and file ID
Launching Database Administration
- RemoteDB is required to be running for Database Administration to work
- Navigate to the HGL Software directory located at C:\HGL Software\ and find DatabaseAdministration.exe and double click to launch the program
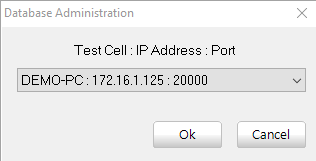
- Select the Test Cell for Database Administration to connect to from the drop down
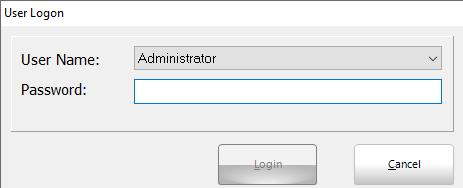
- Login using the same credentials that aurora uses


Database Administration Layout 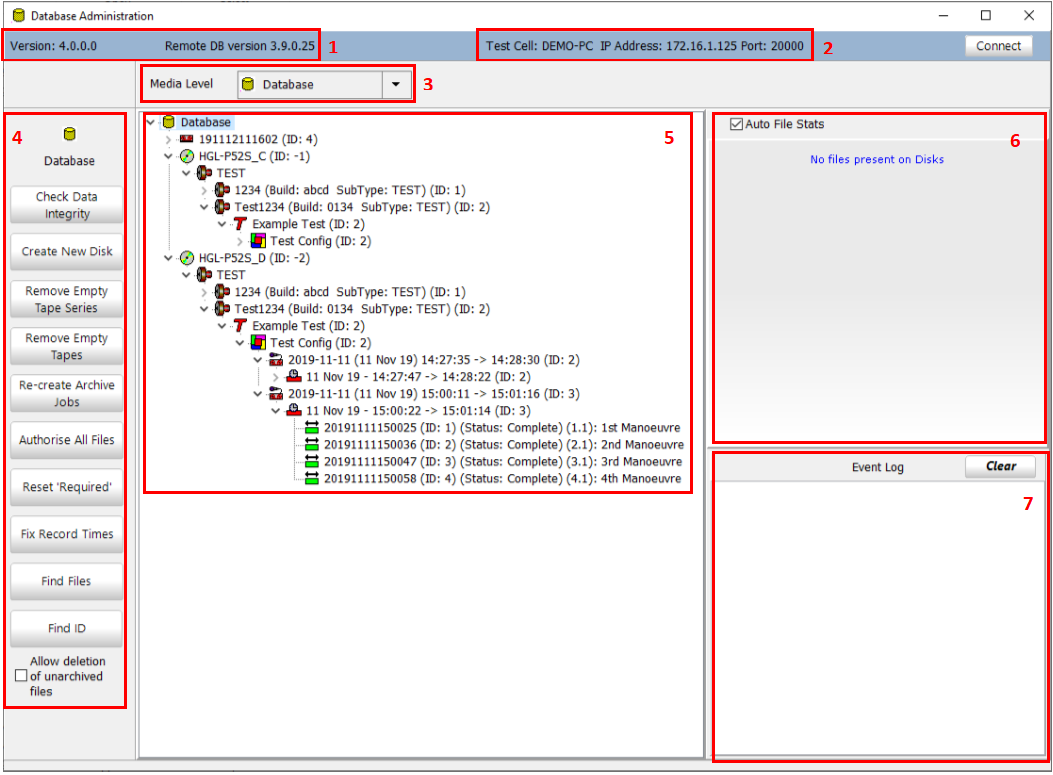

- Software Versions - Displays the version of the DatabaseAdministration.exe and of the RemoteDB.exe that it is connected to
- Test Cell - Shows the connected test cells name, IP address and Port
- Media Level - If the database tree is expanded out this can be used to minimize all branches to the selected level from the drop down
- Options - The options in this area change based on the level that is highlighted in the tree
- Database Tree - Used to navigate to a specific section of data
- File Stats - Displays information based on what is highlighted in the database tree
- Event Log - Displays information on what has been preformed
Database Options
Database options appear when Database is highlighted with the mouse cursor in the Database Tree

- Check Data Integrity - Checks the integrity of all the data in the database based on a date range specified by the user the output appears in the Event Log
- Create New Disk - Allows the user to specify the name of the media and the share name to create a new media
- Remove Empty Tape Series - Removes empty tape series from database the output appears in the Event Log
- Remove Empty Tape - Removes empty tapes from the database the output appears in the Event Log
- Authorise All Files - Sets authorisation flag for all files in the database, if files are stuck transferring this will reset their flag
- Reset 'Required' - removes required flag on all data
- Fix Record Times - fixes invalid segments and recordings the output appears in the Event Log
- Find files - locates files by filename in database
- Find ID - looks for ID number in database tree
- Allow deletion of unarchived files - must be checked to delete unarchived files in the database
General Options

These Options appear for all levels of the data tree with the exception of the whole database itself
- Authorise - resets the authorise flag on the data, doing this at a higher level in the database tree everything underneath it will be effected
- Reset 'Required' - data that has been marked as required in aurora will not be deleted from disk even if archived, resetting this required flag allows the data to be deleted when the disk is full
- Find ID - ID numbers are a way of tagging a manoeuvre, using 'Find ID' searches all branches of the database tree and finds everywhere where the ID is used
- Delete - Used to delete data
Using Database Administration to Delete Data
This should only be preformed if you are 100% sure the data is not needed, deleted data can not be recovered. HGL Software uses a database for the software to know where files are located in the cases of archiving, post processing or playback.

Deleting data using database administration deletes the data references from the database. All child data of the highlighted level in the database tree will be deleted. The system protects the user from deleting data that is not archived but this can be bypassed if the "Allow Deletion of Unarchived Files" box is checked.
To delete files from the disk, versus just the database entries, the check box 'Physically delete files' must be checked.

- If unarchived files will be deleted first highlight database in the tree view and check 'allow deletion of unarchived files'
- Use the database tree to highlight the data to be deleted, the highlighted section must be one of the following
- Manoeuvre - deletes the manoeuvre only
- Segment - deletes the segment and all manoeuvres under the highlighted segment
- Recording - deletes the recording and all segments and manoeuvres under the highlighted recording
- Configuration - deletes the configuration and all recordings, segments, and manoeuvres under the highlighted configuration
- Test - deletes the test and all configurations, recordings, segments, and manoeuvres under the highlighted test
- Serial - deletes the serial and all tests, configurations, recordings, segments, and manoeuvres under the highlighted serial
- Engine - deletes the engine and all serials, tests, configurations, recordings, segments, and manoeuvres under the highlighted engine
- Once the desired level is selected click the delete button in the left hand plan
- A new screen will come up to confirm which media data references will be deleted from, each media has its own database
- All Media will delete from all connected media where the data references are present, this would be used if a data transporter media is connected and the data is on that disk and the systems data drive
- Selecting just one media will remove the data from just that source
Remember, if "Physically Delete Files" is left unchecked then the delete command will just remove the database entries and the raw data files will still remain on disk.
Segment Options
Highlighting a segment gives the user options to check files and check data integrity 
Check Files 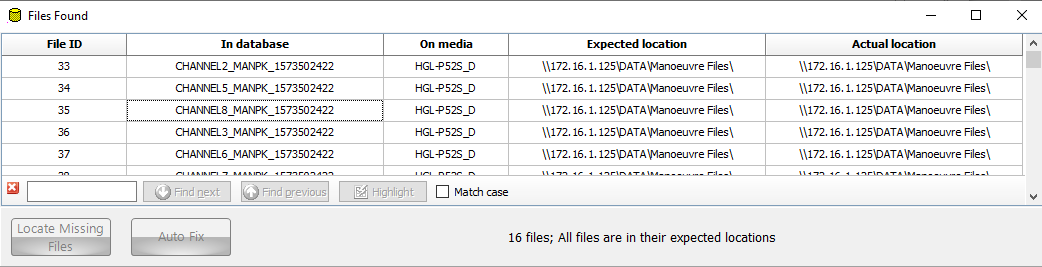

- Displays a list of all the files for the segment and shows their File ID, Media name, Name in Database, expected and actual location
- Clicking the file name or location brings up window explorer to the folder the file is in
- If files are missing this can be used to move them to the correct places
Fixing Missing files
- Missing files will show up as red, if files are missing proceed
- Select 'Locate Missing Files' - if the files can be found they will turn yellow
- Select 'Auto Fix' and the software will move the files to the correct location
Check Data Integrity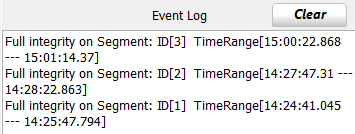

Checks the integrity of the data, displays output in the event log.