
Disk Controller
To use Disk Controller launch all software via HGLSystemManager. Note, the software may automatically launch when the computer turns on.
Please note there are different versions of Disk Controller, therefore not all the steps may be applicable for all Disk Controllers. If an option is unavailable to you, just proceed to the next step.
First, expand the icons in the lower right hand corner of the screen. Right click on Disk Controller and select “Show.”
Media Monitoring
The disks that disk controller would look at is controlled differently based on the version. For 3.9.0.0+ disk controller uses test cells to determine what media databases it will monitor. Prior to 3.9.0.0 manual setup was required to point disk controller to the media.
Version 3.9.0.0+: Login by going to File → Login. The default account set up is:
Username: Administrator
Password: admin
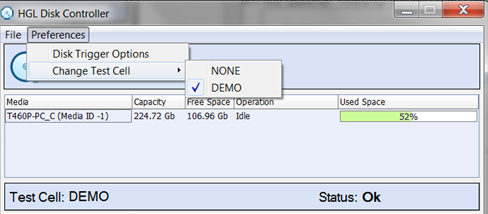
Next, go to Preferences → Change Test Cell and select the Test Cell that the database is in.
Versions Prior to 3.9.0.0:
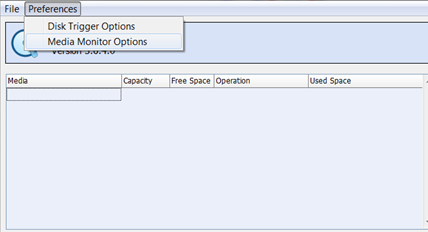
Click on Preferences → Media Monitor Options and then type in the username and password.
The default account set up is:
Username: Administrator
Password: admin
Click on plus sign to view the machines available to Disk Controller
 Then select the machine where the database is located and click on the associated media you wish to monitor or adjust settings on. After you have selected the appropriate media click "Add."
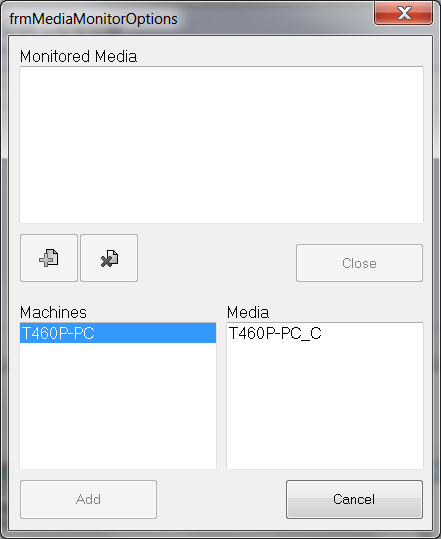
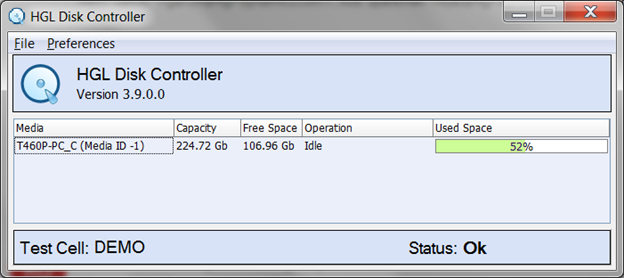
You will see the following window with the media listed under "Monitored Media."
 Close the window and you will see the new media listed on the main Disk Controller page.
Disk Trigger Options
All Versions:
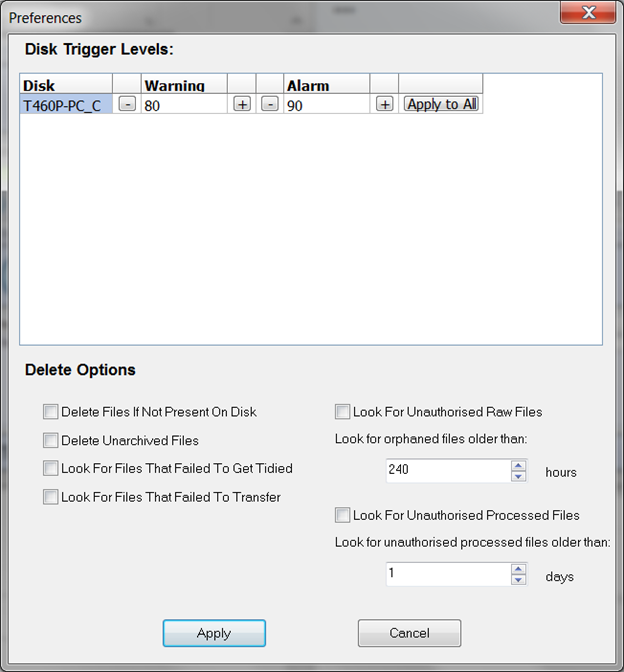
Click Preferences → Disk Trigger Options.
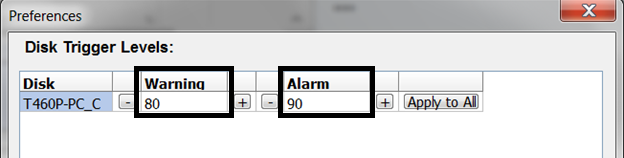
From this page you can adjust settings for all media you are monitoring. The alarm level is the percent of disk space allowed to be used before it will no longer write to the disk. If there are archived files that may be deleted from the disk, Disk Controller will delete those files down to the percentage of disk space percentage of the warning level. i.e. In the example used here, once the disk is 90% full it will delete any archived files to down to 80%. If you set both values to 0 it will delete all archived files not marked as required off of the disk. As long as "Delete Unarchived Files" is NOT checked, it will keep all unarchived files, but will stop writing when the alarm level is reached.
Other settings:
Delete Files Not Present on Disk - This setting will delete database entries of files that not present on the disk. This setting will take into account whether or not "Delete Unarchived Files" is checked or unchecked. Therefore if "Delete Unarchived Files" is checked it will look for database entries that are listed as unarchived and not on disk as well as archived ones.
Delete Unarchived Files - This setting will allow Disk Controller to delete all unarchived files on the disk automatically. This setting is NOT recommended.
Look for Files that Failed to get Tidied - Looks to delete database entries and files that are for some reason tagged as not completing the standard process for files. This could be due to a system failure during recording or other reason. This setting is NOT recommended.
Look for Files that Failed to Transfer - This setting checks for files that failed to transfer in order to delete them.
Look for Unauthorised Raw Files: look for orphaned files older than __ hours - This setting looks for raw files that are unauthorised and orphaned and older than a certain time. If found in the Database, and they exist on disk they are marked as authorised. If the files are not on the disk they are deleted from the database.
Look for Unauthorised Processed Files: look for unauthorised processed files older than __ days - This setting looks for processed files that are unauthorised and orphaned and older than a certain time. If found in the Database, and they exist on disk they are marked as authorised. If the files are not on the disk they are deleted from the database.
Using Disk Controller to Delete Data
This method describes how to delete data that has been archived to tape. Using the delete unarchived files check box will allow the system to delete any and all data files, this is not recommended unless absolutely certain, unarchived data can not be recovered.
- Under the file menu, login with Administrator as the user and admin as the password
- Under the preferences menu select 'Disk Trigger Options'

- Change the Warning Level and Alarm Level to the desired level (0 to delete all archived files)
- Click 'Apply'
- The main screen will now show deleting in the operation column.
- Once the percentage stops going down it is safe to assume that all archived files have been deleted.
- Return to the preferences menu and 'Disk Trigger Options'
- Reset the warning and alarm levels to the previous levels and click apply

